
Here’s a list of five intelligent, yet uncommon, kitchen, remodel ideas to build a beautiful and functional kitchen for zero additional cost. If you’re, installing new kitchen cabinets.
Kitchen Depth
The default depth of the kitchen cabinet above the refrigerator is like 12 inches, which positions it so far back most people can’t even reach it without a ladder. It’s easy to overlook this detail when you have so many other design considerations on your mind for a major home renovation, but this makes the kitchen cabinet over the fridge almost unusable for most people to make matters worse.
Since it’s hard to reach you’ll probably end up setting stuff on top of the fridge, which not only makes the kitchen look cluttered, but it also blocks the cabinet doors from opening. In the case, you actually do climb up there to get something out relative to the cost of buying brand new kitchen cabinets.
You won’t even notice the minuscule difference in price, but you will be much more easily able to use this kitchen cabinet and it’ll help. Keep your kitchen looking tidy, since you can hide that clutter.
That would otherwise be sitting on top of the fridge behind the doors of this kitchen cabinet and while you’re at it, you should probably also consider doing a refrigerator panel on the side of the fridge.
So this way it really just closes in the refrigerator nicely, and you can use this panel to hang coffee mugs. Let’S take a step back here and look at a simple kitchen, remodel idea for you to consider add a pull out.
Trash Can Drawer
Of course you don’t really need this, but if you want an ultra tidy kitchen, you can completely hide the trash and recycling bin neatly into a drawer of your kitchen and speaking of building things into your kitchen cabinets, you might want to reserve a spot for a Beverage fridge: have you ever found yourself short on fridge space instead of installing kitchen cabinets in every single slot, you can reserve an empty space for a dedicated beverage fridge.
Beverage Fridge
These beverage fridges or wine coolers come in different sizes, so you should consider going with a standard size, cutout that’ll accommodate the mini fridge. You want perhaps the best part about installing a mini fridge in your new kitchen remodel.
Is it really only actually costs a little bit extra since you avoid the cost of buying a kitchen cabinet for this spot and you replace it with the price of a mini fridge in our kitchen renovation? A cabinet of this size would have been about 250 dollars and we got this beverage fridge for 400, so it effectively costs about 150 extra. Installing the beverage fridge really added a nice touch to the appearance of our kitchen and contributed to the wow factor of our home renovation, and it also gave us a lot of extra refrigerator space in addition to allowing us to better organize our home.
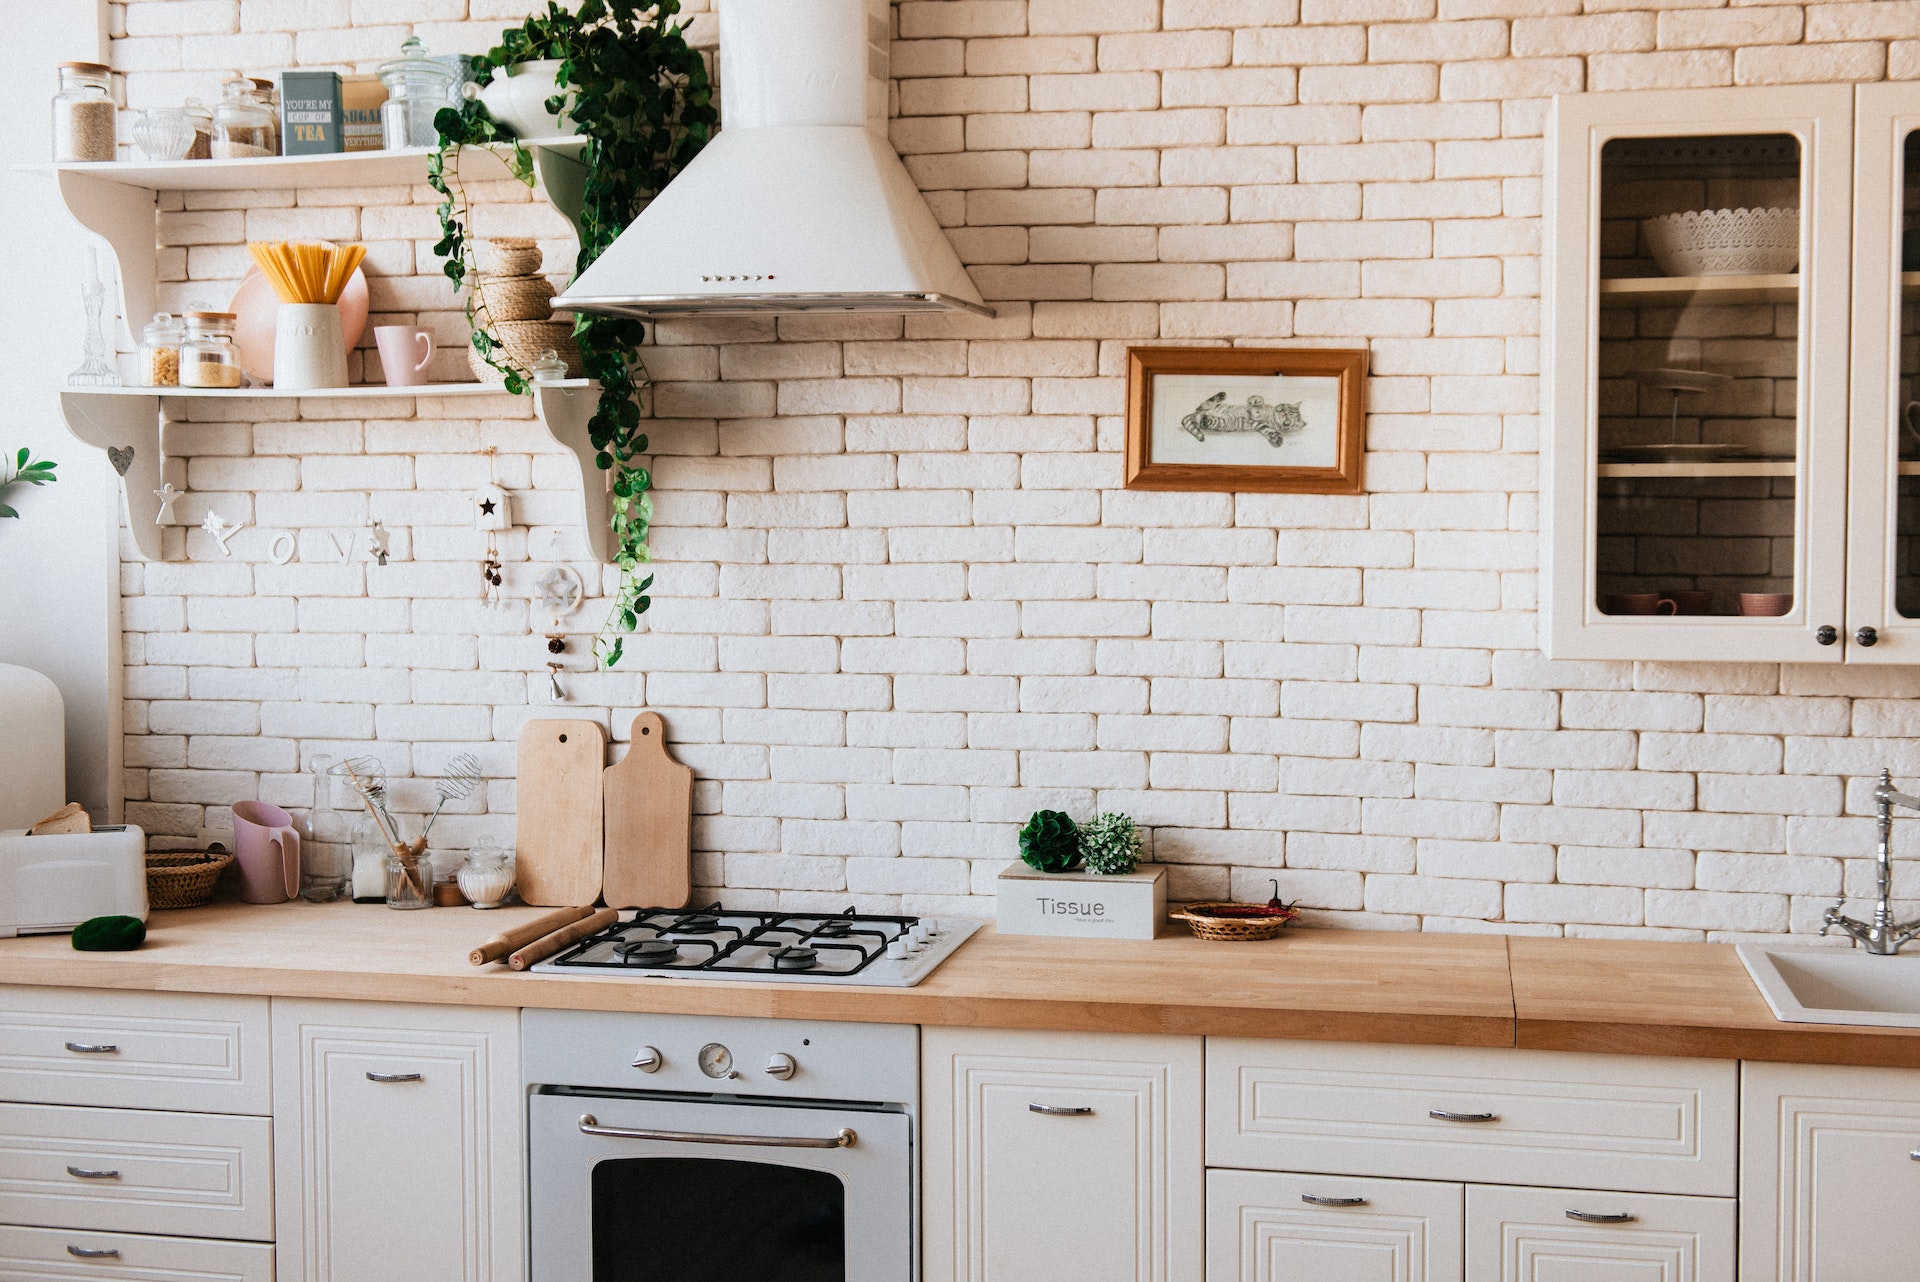
Open Shelving
So next on my list of kitchen remodel ideas for you to consider doing, you probably actually already considered, but that is open shelving, so yeah you’ve probably already seen open shelving in kitchens, and if you like it, I’m gonna go ahead and elaborate a little bit more on our experience doing open shelving. We did floating open shelving in our kitchen and it turned out really good in my opinion, but the installation process was a little bit tedious, probably not as tedious as installing upper kitchen cabinets.
Open shelving in the kitchen has become very popular and it’s a desirable trend in kitchen renovations. When it’s done properly, it can really enhance the aesthetic of your kitchen and make it feel much more open and airy, and it can also save you.
A ton of money in your remodel upper kitchen cabinets aren’t cheap, but a few 12-inch pine boards and steel brackets from amazon.com are upper kitchen. Cabinets are also a lot more difficult to install than the base level kitchen cabinets, because you can’t just set them on the ground and allow gravity to do all the work for you, while you’re adjusting your shims and getting them perfectly level.
So if you’re, considering installing kitchen cabinets on your own, you can really dodge a bullet here by avoiding installing upper cabinets all together. I’Ve personally never installed upper kitchen cabinets, but i could definitely see why they would be much more difficult to do than the base cabinets.
In our case, we didn’t exactly save big money by installing open shelving in the kitchen, because we decided to do a giant backsplash that spanned from the countertop all the way to the top of the nine-foot ceiling.
But this huge backsplash did add a nice wow factor to our kitchen renovation. You don’t need to go all out on your backsplash if you’re doing open shelving in the kitchen and you’re on a tight budget.
You could save a lot of money by stopping the backsplash at the bottom of the shelving. Just remember when you’re out shopping for backsplash tiles, the cost of the tile is only a small fraction of the total cost.
You have to take into consideration the cost of labor to get the backsplash installed as well. So we did avoid the cost of buying the upper cabinets and also dealing with the hassle of installing the upper cabinets, but installing floating open shelving didn’t come without its challenges.
We wanted to have floating shelves with no exposed brackets that would get in the way of dishes or create more of a cluttered appearance. In order to accomplish this, we needed strong steel brackets that securely mounted to the 2×4 studs behind the wall to support the weight of heavy dishes.
Of course, this meant we needed to drill holes into the beautiful tile backsplash that we just paid a ton of money to have installed. This definitely called for a measure twice cut once procedure, because we definitely didn’t want to ruin our beautiful backsplash with exposed holes or cracked tiles.
A diamond tip drill bit was needed to accurately drill through the backsplash tiles, without causing them to crack and shatter. We also used a stud finder to double check the measurements i made prior to the backsplash being installed.
If you’re considering doing floating shelving in the kitchen, you may want to clearly mark the stud locations prior to installing a backsplash and also get a good stud finder to double check where the studs are later next.
Kitchen Island
On my list of kitchen remodel ideas, for you is to consider the overhang of the kitchen island. Are you gonna have chairs at your kitchen island? Have you ever been sitting at a kitchen island or a bar top, where your knees are just like constantly banging up against the wall below the kitchen countertop to me this just like really ruins a nicely done kitchen i mean, even if it looks nice, if your Knees are like banging up against the wall below the overhang of the kitchen cabinet.
This just really screams poorly designed kitchen, and you know if you’re going to remodel your kitchen. In my opinion, you might as well do it right and just make the proper overhang length for your knees to actually fit under there without banging up against the wall.
So if it fits your budget, consider creating a kitchen island with the appropriate legroom for you and your guests to actually be able to sit and enjoy the beautiful new kitchen makeover. You’Re working on the knee space required to sit at a kitchen countertop is dependent on the height of the countertop.
For a standard 36 inch tall countertop, it’s recommended to have 15 inches of knee clearance. If you’re, installing a taller, 42 inch bar height countertop, the taller bar stools, you’ll, be using typically have a design that allows your knees to bend at less of an angle which requires only 12 inches of overhang.
In order to not hit your knees on the wall. Below the countertop, depending on the kitchen, countertop material you choose, and the thickness of that material, there’s a particular specified amount of maximum overhang.
You can have on your kitchen island without having the need for additional support brackets. A thick countertop can have more of an overhang without support brackets because it’s stronger than a thin countertop.
For example, in our kitchen renovation, we chose quartz countertops with a thickness of three centimeters and the resulting maximum overhang without the need for additional support. Brackets is 12 inches, even though 15 inches was recommended.
We thought 12 inches for our table. Height chairs was enough leg clearance, so we can sit in a chair at the kitchen countertop and eat without banging our knees on the wall. We didn’t feel like. It was worth the extra cost and hassle to install support brackets just to extend the countertop three more inches.
Also, since there are no support brackets under the countertop, you don’t need to worry about hitting your knees on the support brackets, either in our kitchen remodel. Since we decided to go with the maximum possible overhang without doing additional brackets, it’d probably be really wise to be careful about not like hopping up on the edge of that countertop and sitting on it, because it could easily snap off and break the cork slab and That would be a very costly mistake and, while we’re speaking of clearances be sure to give each chair at your new kitchen, countertop 24 inches of room, so you don’t need to be packed in like sardines.
Another kitchen, remodel idea for you is to install some outlets with standard plugs, as well as usb outlets under the kitchen island, so you and your guests can charge a cell phone with a usb cable. Next, on my list of kitchen remodel ideas, i want to take a step back and rewind back to kitchen countertop overhang.
Previously, i talked about using the appropriate amount of space for leg clearance for sitting at your kitchen countertops. But now i want to talk about the actual standard, overhang distance for a kitchen countertop, the standard kitchen countertop overhang is an inch and a half.
A current trend in kitchen remodels is to have the kitchen cabinet drawer flush with the face of the countertop. Initially, we considered going with the current trend of flush countertop overhang, but we ended up deciding to go with the standard overhang for two major reasons.
The functional purpose of having a countertop overhang is so when you spill stuff on the countertop it’ll fall onto the floor and not get all over the kitchen cabinet drawers. If the countertop is flush with the face of the cabinets and a gallon of orange juice gets knocked over you’re looking at a potential nightmare of a cleanup.
Not only is the orange juice surely going to get all over the face of the cabinets and the hardware, it’s also much more likely to get into the actual kitchen cabinets and the creases and seams of the actual jars.
So if you or anyone else in your home is accident prone in the kitchen, i’d definitely take this into consideration before doing a flush. Mount countertop. The spill factor alone was reason enough for me to go at the standard overhang distance.
But in addition, if you’re going to go with a flush, countertop alignment – and you don’t get every part of the kitchen cabinet installation process done precisely correct with all the kitchen cabinet faces lining up perfectly, then it might not look as good as in the pictures you’re.
Seeing online just a little bit of countertop overhang will help to hide any imperfection of drawer alignment and camouflage the dishwasher or the oven range that sticks out just a little bit further than the rest of the kitchen cabinets okay, so i don’t want to keep you Here all day, so i’m going to leave you with one last idea for your kitchen remodel, and this will be especially helpful if you’re on a budget or you’re really just trying to save costs in your kitchen remodel.